Injector flow and fuel pump calculator
Single Injector Flow (CC): 0 cc/min
Single Injector Flow (lb/hr): 0 lb/hr
Fuel Pump Flow Required (lb/hr): 0 lb/hr
Fuel Pump Flow Required (LPH): 0 L/hr
Fuel Flow Calculator & Injector Sizing Notes
The adjacent calculator helps estimate required injector size (lb/hr or cc/min) and fuel pump flow based on your target horsepower, fuel type, induction method, and safety preferences.
Key inputs and assumptions are explained below — always verify final values against your specific setup, dyno results, and component manufacturer data.
• Desired Horsepower: Enter realistic HP goal (wheel or crank — be consistent)
• Number of Cylinders / Injectors: Enter total injectors (e.g., 8 for V8, 12 if 2 injectors/cylinder)
• Injector Duty Cycle: Target % of max injector open time — plan ~80% for safety & longevity (avoid >90–95% continuous)
• Fuel Type: Gasoline (~6.17 lb/gal) or E85 (~6.55 lb/gal) — E85 requires ~30% more fuel volume
• Induction Type & BSFC:
– Gasoline: 0.50 (N/A), 0.60 (Turbo), 0.62 (Supercharged)
– E85: 0.70 (N/A), 0.85 (Turbo), 0.87 (Supercharged)
- Hotrod.com has a great article on BSFC.
• Safety Margin: Checking this adds 20% extra capacity (recommended — prevents running pump/injectors at limit)
• Injector Size: Output in lb/hr (or convert to cc/min) — use this to select appropriate injectors
• Fuel Pump Flow: Output typically in LPH — common reference: Walbro 450 ≈ 450 LPH at base pressure
Important: Fuel pump flow decreases with rising boost (must overcome manifold pressure). Real-world flow is often lower than rated — size pump conservatively and consider return-style systems with proper FPR.
Always cross-check final injector & pump sizing with dyno data, fuel pressure logs, and manufacturer specs. Incorrect sizing can cause lean conditions, detonation, or fuel starvation under load.
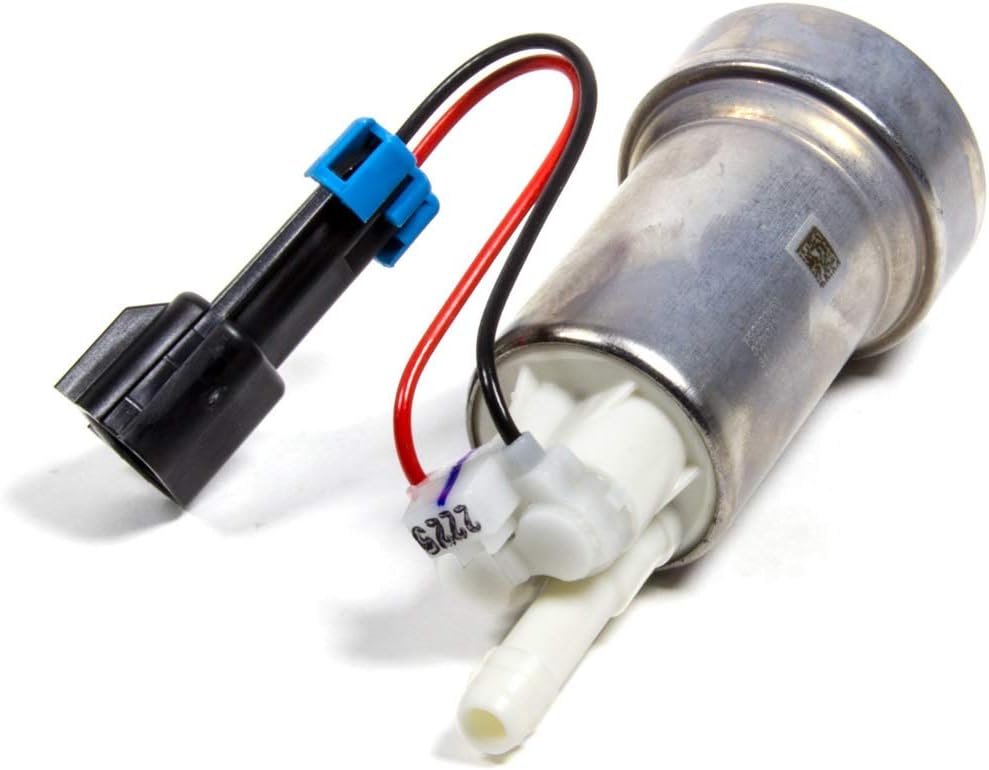
Walbro F90000267 450 LPH E85 fuel pump
Buy on Amazon As an Amazon Associate I earn from qualifying purchases
8Pcs Crimping Tool Kit for Heat Shrink Terminals, Non-Insulated, Open Barrel, Solar Conncetors, Insulated and Non-Insulated Ferrules
Buy on Amazon As an Amazon Associate I earn from qualifying purchases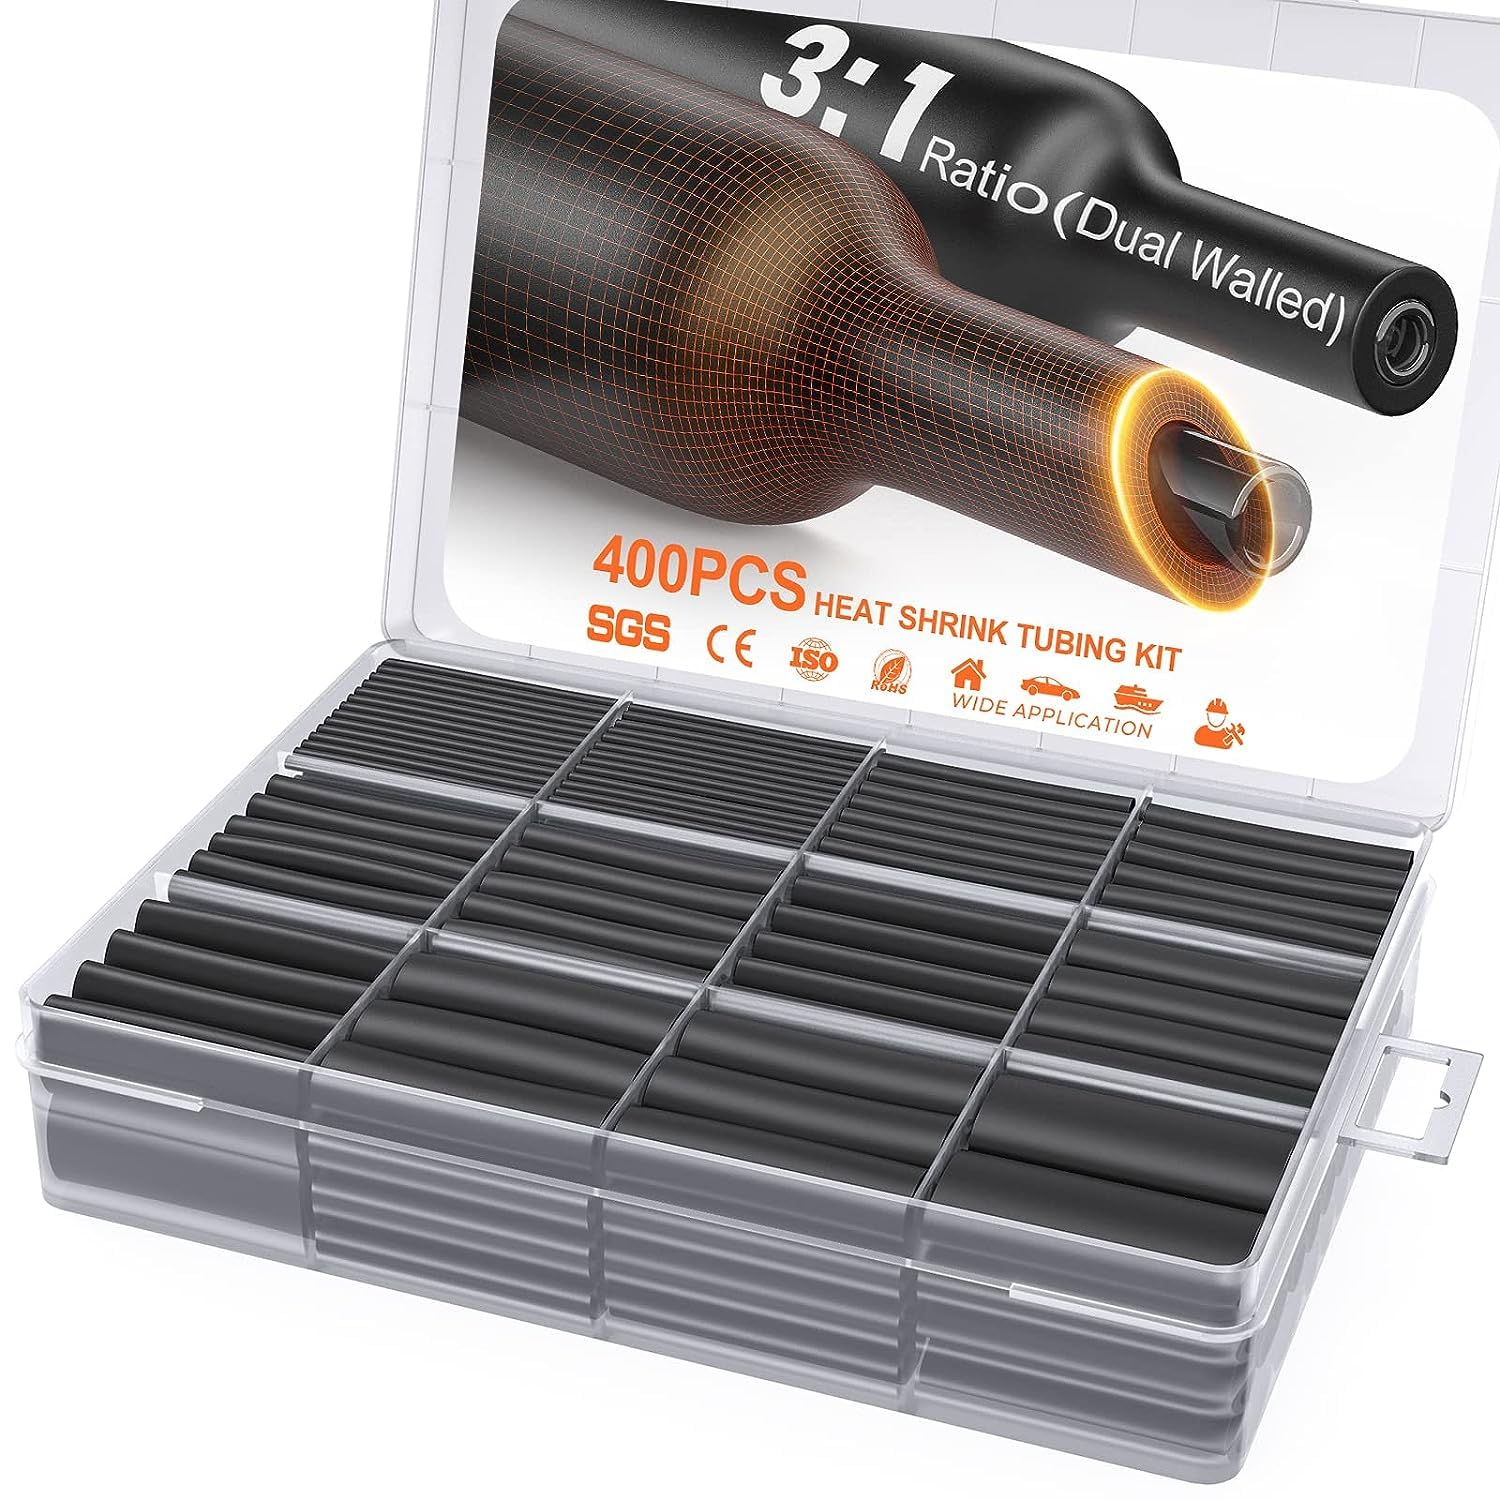
400 Pcs Heat Shrink Tubing Kit-3:1 Ratio Adhesive Lined,Marine Grade Shrink Wrap - Industrial Heat-Shrink Tubing - Black
Buy on Amazon As an Amazon Associate I earn from qualifying purchases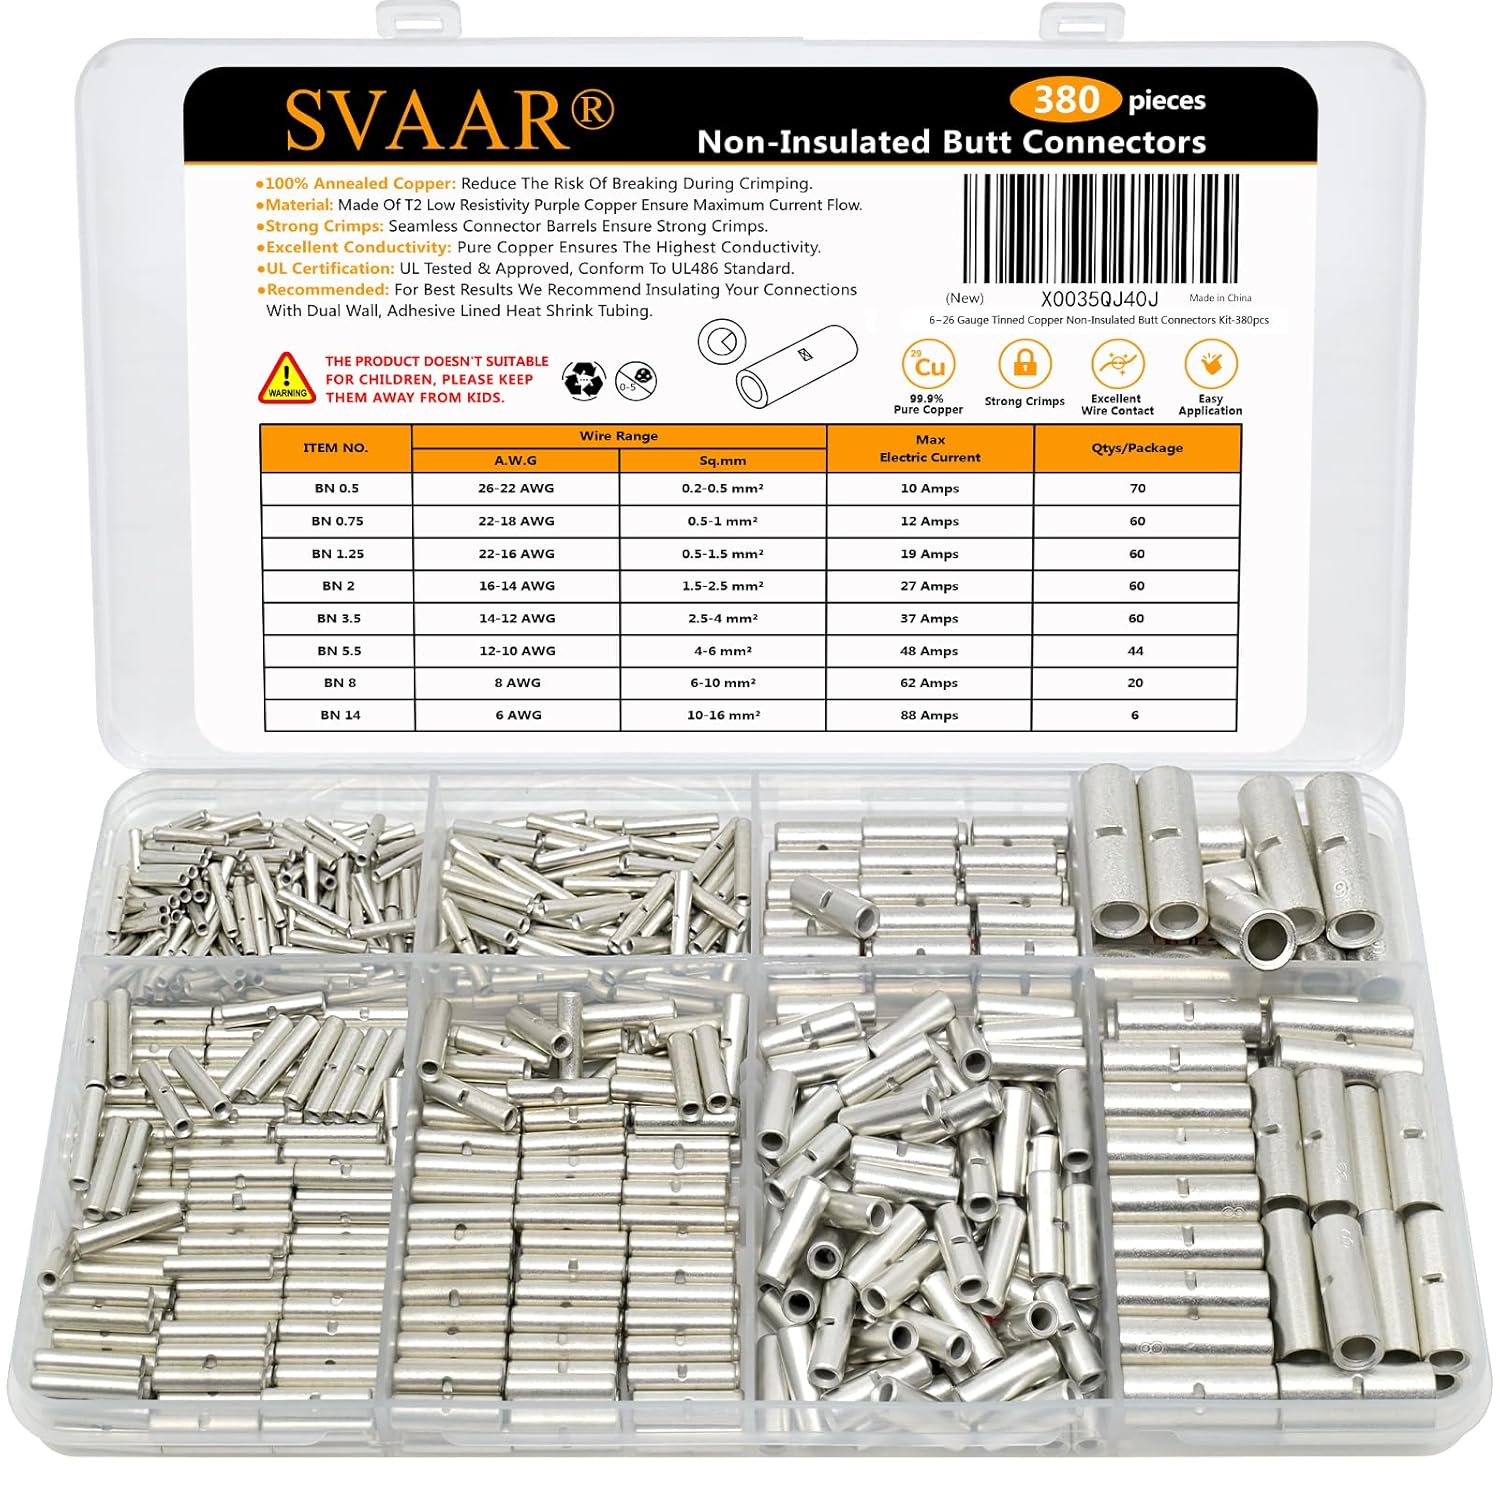
SVAAR 380PCS Non Insulated Butt Connectors Kit Butt Splice Connector Uninsulated Wire Splice Connectors for 26 to 6 Gauge Wire Marine Grade Tinned Copper Seamless Barrel Crimp Butt Splice Terminals
Buy on Amazon As an Amazon Associate I earn from qualifying purchases
3M Scotch Super 33+ Vinyl Electrical Tape, .75-Inch by 66-Feet
Buy on Amazon As an Amazon Associate I earn from qualifying purchases
Walbro F90000267 450 LPH E85 fuel pump
Buy on Amazon As an Amazon Associate I earn from qualifying purchases
8Pcs Crimping Tool Kit for Heat Shrink Terminals, Non-Insulated, Open Barrel, Solar Conncetors, Insulated and Non-Insulated Ferrules
Buy on Amazon As an Amazon Associate I earn from qualifying purchases
400 Pcs Heat Shrink Tubing Kit-3:1 Ratio Adhesive Lined,Marine Grade Shrink Wrap - Industrial Heat-Shrink Tubing - Black
Buy on Amazon As an Amazon Associate I earn from qualifying purchases
SVAAR 380PCS Non Insulated Butt Connectors Kit Butt Splice Connector Uninsulated Wire Splice Connectors for 26 to 6 Gauge Wire Marine Grade Tinned Copper Seamless Barrel Crimp Butt Splice Terminals
Buy on Amazon As an Amazon Associate I earn from qualifying purchases
3M Scotch Super 33+ Vinyl Electrical Tape, .75-Inch by 66-Feet
Buy on Amazon As an Amazon Associate I earn from qualifying purchasesbefore you buy your fuel pump!
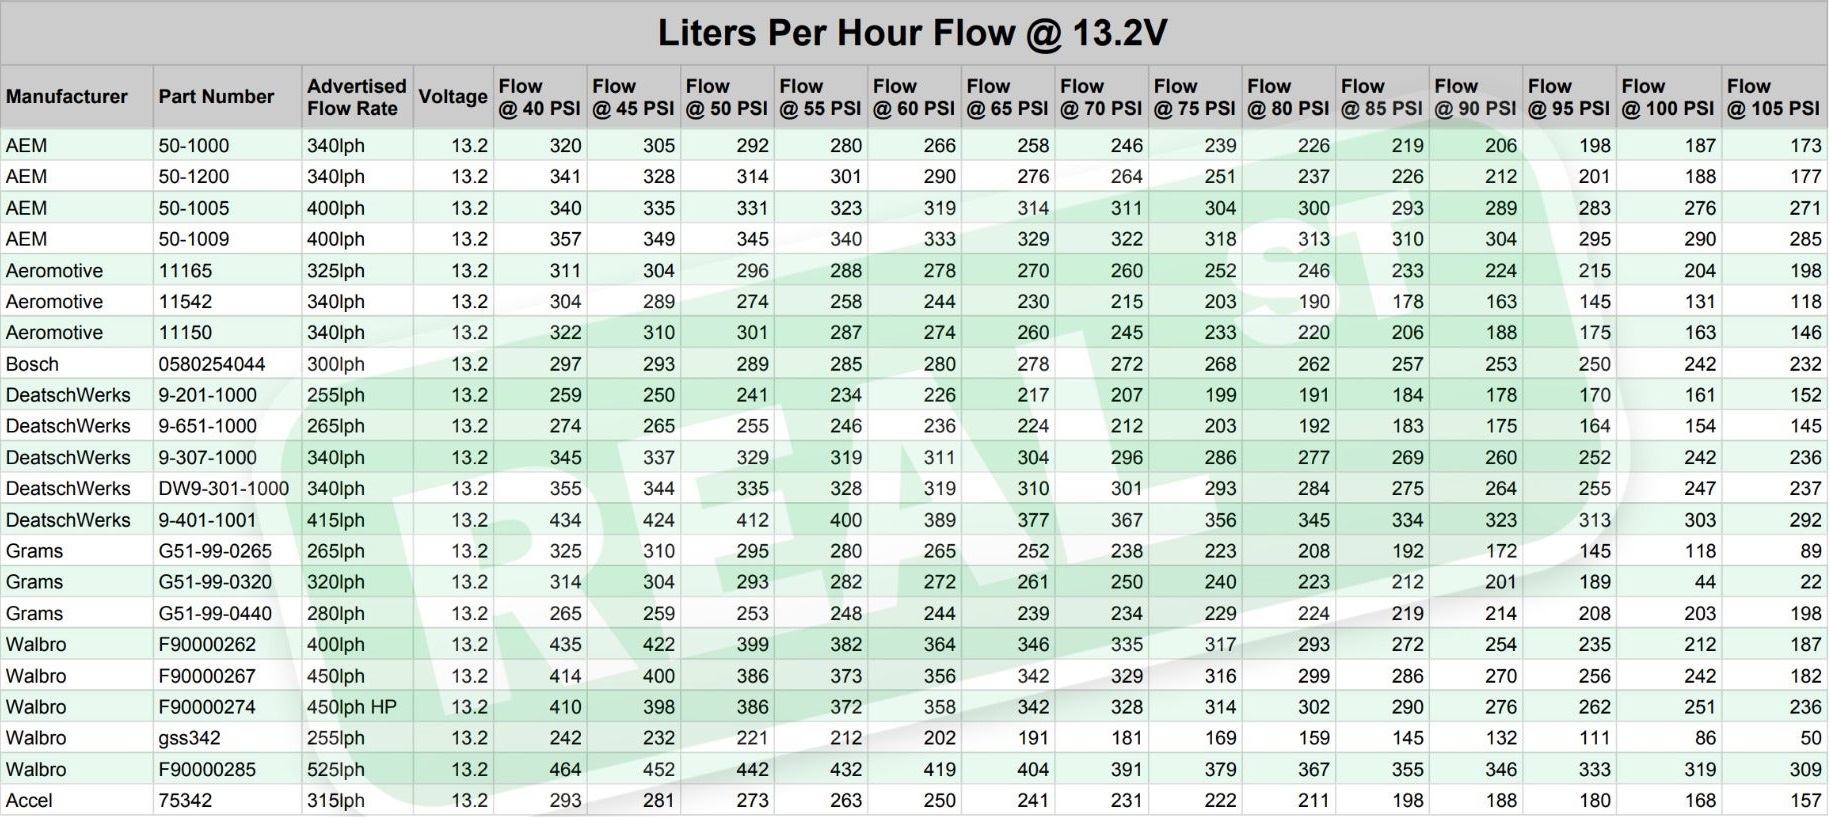
Before you select your fuel pump, there are some important things to know. First of all, if the box states that it flows "450 LPH" (or any other rating), it will typically flow a little less once installed in your car under real-world conditions.
Real Street Performance conducted independent flow tests on many popular in-tank fuel pumps (comparing advertised vs. actual flow rates across various pressures). You can read the full comparison here: In-Tank Fuel Pump Comparison Test. The adjacent picture shows a screenshot from their test results webpage, illustrating how actual flow often falls short of the labeled rating—especially at higher system pressures.
E85 flow vs. petroleum: Your engine requires significantly more fuel volume when running E85 (due to its lower energy density and stoichiometric requirements). Factor this into your build—you may need larger pumps, dual pumps, or a higher-capacity setup to maintain proper fueling.
• Advertised flow (e.g., "450 LPH") is typically measured under ideal conditions—real-world flow in the car is usually lower
• See Real Street Performance's independent test for actual vs. claimed flow rates on popular pumps
• Higher system pressure reduces flow on all pumps (normal behavior)
• E85 demands 30–40% more fuel volume than gasoline—plan accordingly (may require dual pumps or larger single pump)
• Always verify your pump's real-world capability against your horsepower goals, fuel type, and pressure requirements
Choose conservatively to avoid lean conditions, especially under boost or high load.
This is not an overly complicated installation. The fuel pump kit used here is a budget/cheaply made unit (brand not mentioned to avoid direct criticism). Installation details and lessons learned are outlined below.
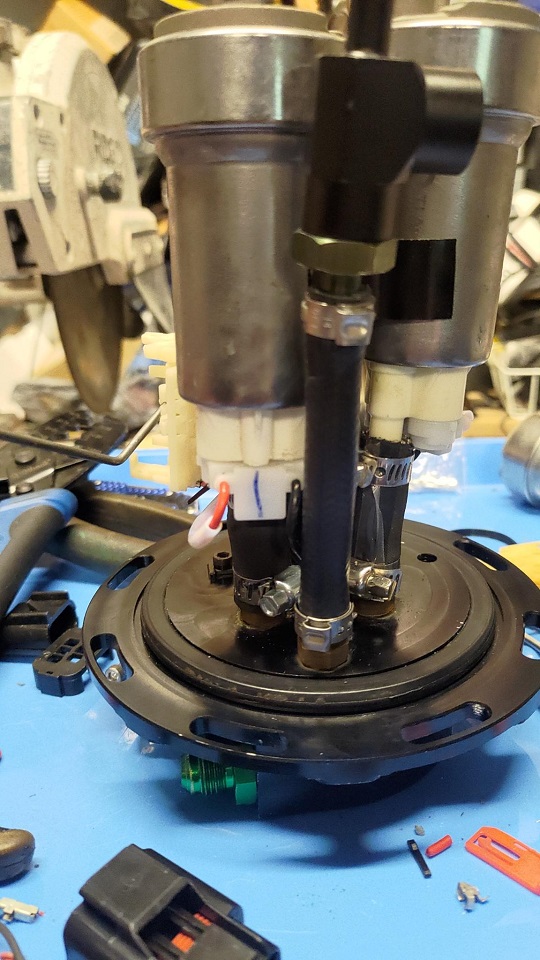
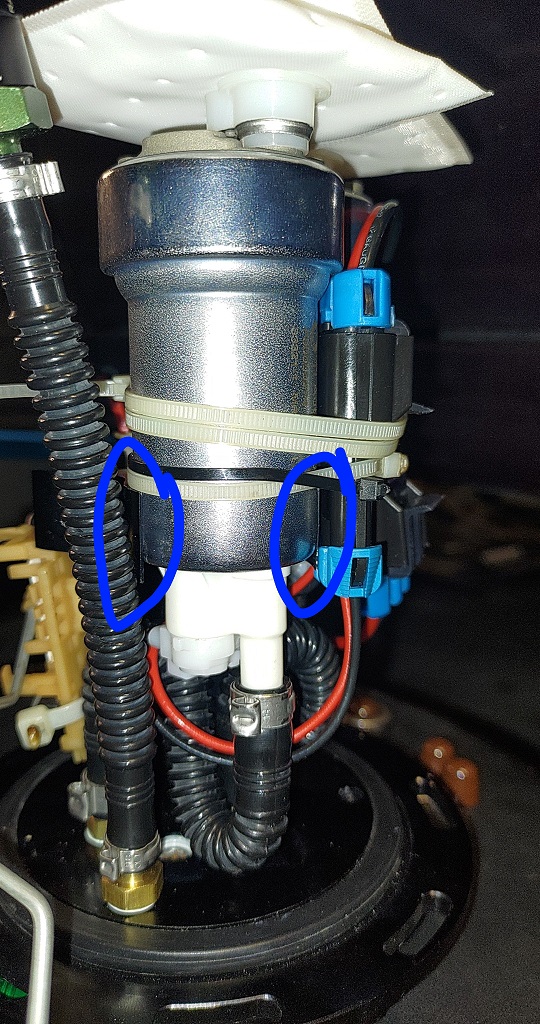
Initially, 9-inch corrugated tubes were used to connect the pump outlet to the bottom of the tophat (visible in the 3rd picture of the adjacent slideshow). The loop in the hose caused it to push downward or sit at an angle. These corrugated tubes were eventually abandoned because they were easy to nick while sliding into the tank — and even minor scratches significantly reduce pressure rating and safety. Replaced with E85-rated rubber hose (rated ~300 PSI) slipped straight onto the top of each pump while rotating the pumps to align with the tophat ports (also visible in the pictures).
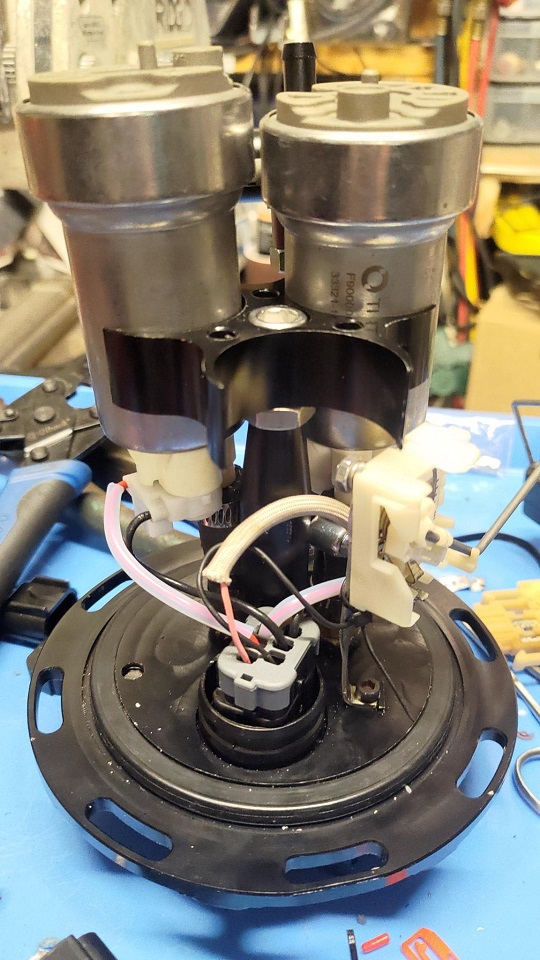
Modifying the Fuel Pump Hanger / Assembly
- Extended the support arm lower by adding a stainless nut at the base of the fuel pump holders (assembly appears upside-down in photos — see 1st picture). Without this, the holders positioned the pumps too high after hose installation, making them prone to falling/sliding.
- The original connector insulators (designed to be fuel-immersed) disintegrated quickly. Removed the insulator block entirely from the connector. Gasoline is more dielectric (insulating) than conductive — exposed wires in fuel do not short or create unwanted connections. Confirmed with RaceTronix and other in-tank Apex-style connector suppliers/distributors: do not use the seal/insulator block in this application.
- With straight hoses, the pumps fit much better overall. They no longer drop excessively low to contact the tank bottom, yet remain low enough to pick up fuel reliably even at low tank levels.
- Side effect of straight hoses: fuel level sender had to be rotated slightly toward the front of the car (from original orientation). This caused the float arm to rub the front tank wall, so the arm was carefully bent back toward the center of the tank to restore clearance.
Triggering the Second Fuel Pump
Do not run both pumps at all times — it is unnecessary and generates excess heat/noise. Most tuning platforms allow easy staging:
- Secondary pump activated via a second relay + second relay output trigger at a chosen boost threshold.
- Recommended approach: Enable a Check Engine Light (CEL) in the ECU software (e.g. Haltech) that triggers on low fuel pressure.
- Monitor actual fuel pressure during dyno runs or hard acceleration.
- If/when fuel pressure starts dropping enough to trigger your engine protection CEL, set the second pump to activate ~5 psi of boost below that point as a safety margin.
• Avoid corrugated hose — easily damaged; use high-pressure E85-rated straight rubber hose instead
• Extend pump holder support with nut/standoff to prevent pumps from falling/sliding
• Remove in-tank connector insulator block (confirmed safe by multiple fuel system specialists)
• Adjust fuel sender orientation and bend float arm if needed for clearance
• Stage second pump on boost — do not run both constantly
• Use fuel pressure-based CEL protection → trigger secondary pump ~5 psi boost below pressure-drop threshold
Always verify clearances, fuel pickup at low level, and pressure behavior on dyno before track use.
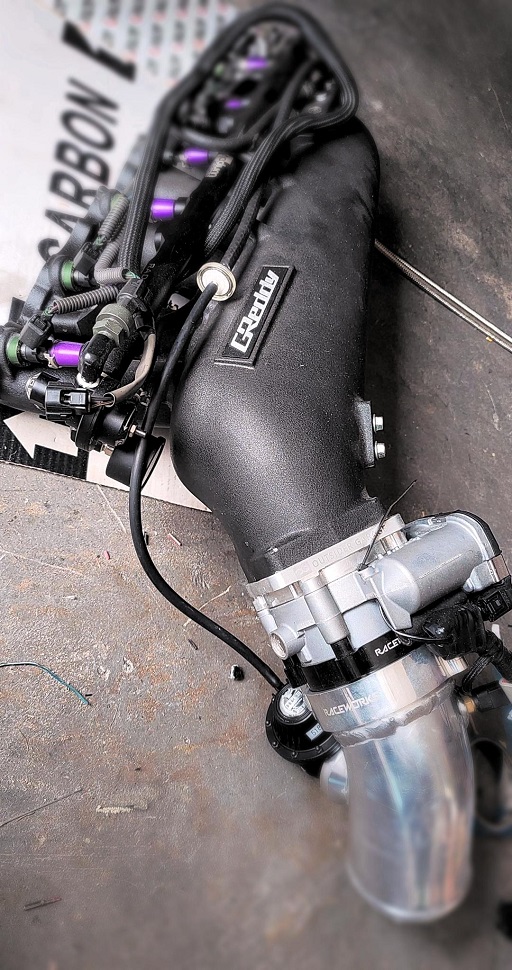
The intake manifold I bought used off of a Supra locally on Craigslist, it had seen approximately 20 years of use. After a sandblasting and a powder coat it looked new again.
The Radium parts (fuel rail, injector pulse damper, fuel pressure regulator and pressure gauge) add a touch of elegance.
The Bosch 82mm throttle body on the front of the Greddy intake manifold curves around the OEM IS300 power steering reservoir perfectly!
• Sourced used from a Supra via local Craigslist listing
• Approximately 20 years of prior use
• Refreshed via sandblasting and powder coating — now appears new
• Upgraded with premium Radium components: fuel rail, injector pulse damper, fuel pressure regulator, and pressure gauge
• Features Bosch 82mm throttle body mounted on Greddy intake manifold
• Throttle body placement elegantly curves around the factory IS300 power steering reservoir
A nicely refreshed and upgraded removable intake setup ready for installation.